

“`html
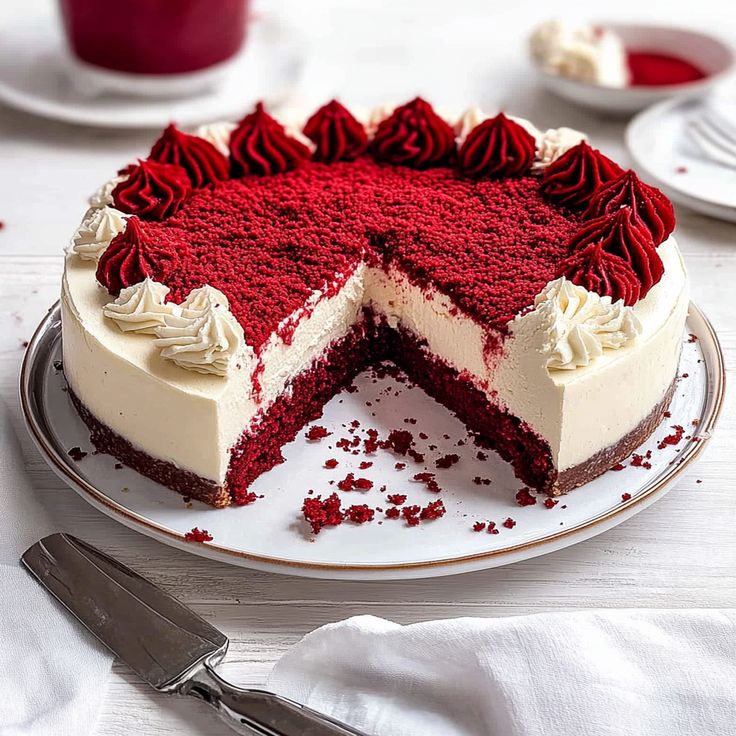
Easy Red Velvet Cheesecake Recipe You Must Try
What if you could combine two of the most beloved desserts into one jaw-dropping showstopper? Imagine the rich, velvety cocoa flavor of red velvet cake perfectly married with the creamy, tangy lusciousness of cheesecake. This Easy Red Velvet Cheesecake is exactly that dream come true — and it’s surprisingly simple to make at home.
Whether you’re hosting a dinner party or craving something indulgent on a quiet weekend, this recipe delivers stunning results every single time. No fancy pastry skills required. Just great ingredients, clear steps, and a little patience. Let’s dive in!
Why You’ll Love This Recipe
This isn’t just another cheesecake recipe. It’s a visually stunning, crowd-pleasing masterpiece that tastes as incredible as it looks. The deep crimson color makes it a perfect dessert for parties, holiday gatherings, birthdays, and romantic dinners.
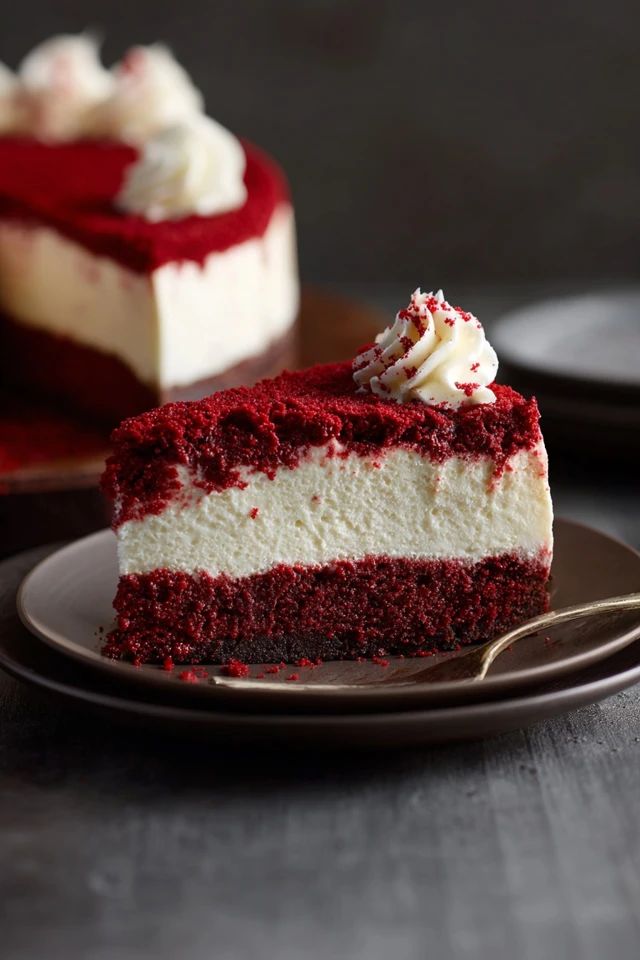
The combination of a buttery Oreo crust, a smooth cream cheese filling, and a bold red velvet layer creates layers of flavor and texture that will leave everyone asking for seconds. Best of all, the steps are beginner-friendly and straightforward.
Ingredients List
Gather these ingredients before you start. Quality matters here — use full-fat cream cheese for the creamiest, most moist cheesecake possible.
For the Oreo Cookie Crust:
- 24 Oreo cookies (crushed into fine crumbs)
- 5 tablespoons unsalted butter (melted)
- Pinch of salt
For the Red Velvet Cheesecake Filling:
- 24 oz (680g) full-fat cream cheese (softened to room temperature)
- 1 cup granulated sugar
- 3 large eggs (room temperature)
- 1 cup sour cream
- 2 tablespoons unsweetened cocoa powder
- 1 tablespoon red food coloring (gel preferred for vibrant color)
- 1 teaspoon pure vanilla extract
- 1 tablespoon white vinegar
- 2 tablespoons all-purpose flour
For the Cream Cheese Topping:
- 8 oz (225g) cream cheese (softened)
- 1/3 cup powdered sugar
- 1 teaspoon vanilla extract
- 1 cup heavy whipping cream
Ingredient Substitution Tips:
- No sour cream? Use full-fat Greek yogurt for a similar tangy richness.
- Gluten-free option: Swap regular Oreos for gluten-free sandwich cookies.
- Natural food coloring: Use beet powder (about 2–3 tablespoons) instead of artificial red dye.
- Dairy-free version: Use vegan cream cheese and coconut cream as alternatives.
Timing
Planning ahead is key to cheesecake success. Here’s a breakdown of the time commitment involved so you can schedule accordingly.
- Prep Time: 25 minutes
- Bake Time: 60–65 minutes
- Cooling & Chilling Time: 6–8 hours (or overnight)
- Total Active Time: Approximately 90 minutes
That’s roughly 20% less active hands-on time than the average layered red velvet cake recipe, which often requires frosting multiple layers. The chilling time does the heavy lifting for you while you relax!
Step-by-Step Instructions
Follow these steps carefully for a perfectly baked, crack-free cheesecake every time. Each step includes helpful tips to ensure success.
Step 1: Prepare Your Pan and Preheat the Oven
Preheat your oven to 325°F (163°C). Grease a 9-inch springform pan with butter or non-stick spray. Wrap the outside of the pan tightly with two layers of heavy-duty aluminum foil. This prevents water from seeping in during the water bath baking process.
Step 2: Make the Oreo Crust
Crush the Oreo cookies (filling included) in a food processor until fine crumbs form. Mix with melted butter and a pinch of salt until the texture resembles wet sand. Press the mixture firmly and evenly into the bottom of the prepared springform pan using the back of a spoon or a flat-bottomed glass.
Bake the crust for 10 minutes, then remove and let it cool slightly while you prepare the filling.
Step 3: Beat the Cream Cheese
In a large mixing bowl, beat the softened cream cheese on medium speed for 2–3 minutes until completely smooth and fluffy. Scrape down the sides of the bowl frequently. Gradually add the granulated sugar and beat for another 2 minutes. Avoid over-mixing, as excess air causes cracks.
Step 4: Add the Red Velvet Ingredients
Add the cocoa powder, red food coloring, vanilla extract, and white vinegar to the cream cheese mixture. Mix on low speed until fully incorporated. The color should be a deep, vibrant crimson — stunning and rich.
Add the eggs one at a time, mixing on low speed after each addition just until combined. Over-beating eggs is one of the top causes of cheesecake cracking, so be gentle here.
Step 5: Fold in Sour Cream and Flour
Gently fold in the sour cream and flour using a rubber spatula until the batter is silky smooth and uniform. The flour adds just enough structure to keep the cheesecake sliceable without making it dense or cakey.
Step 6: Bake Using a Water Bath
Pour the filling over the cooled crust and smooth the top with a spatula. Place the foil-wrapped springform pan inside a larger roasting pan. Pour hot water into the roasting pan until it reaches about 1 inch up the sides of the springform pan.
Bake at 325°F for 60–65 minutes. The edges should be set, but the center should still have a slight jiggle — like Jell-O, not liquid. This is the sweet spot for a perfectly moist cheesecake.
Step 7: Cool Slowly and Chill
Turn off the oven and crack the door open slightly. Let the cheesecake cool inside the oven for 1 hour. This gradual cooling prevents sudden temperature changes that cause cracking. Then transfer to the counter for another hour before refrigerating for at least 6 hours or overnight.
Step 8: Make the Cream Cheese Topping
Beat the softened cream cheese with powdered sugar and vanilla until smooth. In a separate bowl, whip the heavy cream to stiff peaks. Gently fold the whipped cream into the cream cheese mixture until light and fluffy. Spread or pipe this topping over the chilled cheesecake before serving.
Nutritional Information
The following values are approximate, based on 12 servings per cheesecake. Individual values may vary depending on specific brands and substitutions used.
- Calories: 480 per slice
- Total Fat: 34g
- Saturated Fat: 19g
- Cholesterol: 145mg
- Sodium: 310mg
- Total Carbohydrates: 38g
- Sugars: 28g
- Protein: 8g
- Calcium: 10% Daily Value
Cheesecake is undeniably indulgent, but it also provides a meaningful dose of protein and calcium from the cream cheese and eggs. Enjoying a moderate slice as an occasional treat fits comfortably into a balanced lifestyle.

Easy Red Velvet Cheesecake Recipe You Must Try
Ingredients
For the Oreo Cookie Crust:
- 24 Oreo cookies crushed into fine crumbs
- 5 tablespoons unsalted butter melted
- Pinch of salt
For the Red Velvet Cheesecake Filling:
- 24 oz 680g full-fat cream cheese (softened to room temperature)
- 1 cup granulated sugar
- 3 large eggs room temperature
- 1 cup sour cream
- 2 tablespoons unsweetened cocoa powder
- 1 tablespoon red food coloring gel preferred for vibrant color
- 1 teaspoon pure vanilla extract
- 1 tablespoon white vinegar
- 2 tablespoons all-purpose flour
For the Cream Cheese Topping:
- 8 oz 225g cream cheese (softened)
- 1/3 cup powdered sugar
- 1 teaspoon vanilla extract
- 1 cup heavy whipping cream
Instructions
- Read in the article
Video
Did you try our recipe?
There are no reviews yet. Be the first one to write one.
Healthier Alternatives for the Recipe
Want to lighten things up without sacrificing that luscious flavor? These smart swaps make this Easy Red Velvet Cheesecake more diet-friendly while keeping it delicious.
- Reduce sugar: Cut granulated sugar to 3/4 cup and use a natural sweetener like monk fruit or erythritol for the remaining portion.
- Lower fat: Use Neufchâtel cheese (1/3 less fat than cream cheese) for a lighter filling with nearly identical texture.
- Higher protein: Replace sour cream with full-fat Greek yogurt to boost protein content by approximately 3–4 grams per slice.
- Natural coloring: Beet powder is a fantastic, antioxidant-rich alternative to artificial red dye — use 2–3 tablespoons for a gorgeous natural hue.
- Gluten-free crust: Almond flour mixed with melted butter and a touch of sugar makes a delicious, grain-free crust alternative.
- Vegan version: Use vegan cream cheese, flax eggs (1 tablespoon ground flax + 3 tablespoons water per egg), and coconut cream for the topping.
Serving Suggestions
Presentation elevates this already stunning dessert to another level. Here are some creative ways to serve your masterpiece.
- Classic elegance: Pipe rosettes of the cream cheese topping and garnish with fresh raspberries and a dusting of cocoa powder.
- Holiday flair: Add crushed candy canes on top for a festive Christmas presentation that’s as beautiful as it is delicious.
- Chocolate drizzle: Drizzle warm dark chocolate ganache over each slice just before serving for extra indulgence.
- Mini cheesecakes: Use a muffin tin with cupcake liners to make individual portions — perfect for buffet-style party serving.
- Pair with beverages: Serve alongside a hot espresso, a glass of dessert wine, or a cold glass of milk for a complete experience.
This cheesecake is stunning enough to serve at weddings, baby showers, Valentine’s Day dinners, or Christmas celebrations. The bold red color makes it inherently festive and photogenic.
Common Mistakes to Avoid
Even experienced bakers can stumble with cheesecake. Avoid these frequent pitfalls to guarantee a flawless result every time.
- Using cold cream cheese: Cold cream cheese creates a lumpy batter. Always soften it at room temperature for at least 1 hour before starting.
- Over-mixing the batter: Incorporating too much air into the batter leads to cracks during baking. Mix on low speed and stop as soon as ingredients are combined.
- Skipping the water bath: The water bath creates gentle, even heat and adds moisture to the oven environment. Skipping it dramatically increases the risk of cracking and uneven baking.
- Opening the oven door frequently: Temperature fluctuations cause the cheesecake to sink or crack. Resist the urge to peek until the minimum bake time has elapsed.
- Not chilling long enough: A cheesecake needs at least 6 hours to fully set. Cutting into it too early results in a soft, runny center that won’t hold its shape.
- Using liquid food coloring: Liquid dye is less concentrated and can affect the batter’s consistency. Gel food coloring delivers a more vibrant color with a smaller quantity.
Storing Tips for the Recipe
Proper storage keeps your cheesecake fresh, flavorful, and beautiful for days after baking.
- Refrigerator: Cover the cheesecake loosely with plastic wrap or store in an airtight container. It stays fresh in the fridge for up to 5 days.
- Freezer: This Easy Red Velvet Cheesecake freezes beautifully. Wrap individual slices tightly in plastic wrap, then place in a freezer-safe bag. Freeze for up to 2 months.
- Thawing: Transfer frozen slices to the refrigerator and let them thaw overnight. Avoid microwaving, as it alters the texture significantly.
- Add toppings fresh: For best results, add the cream cheese topping and garnishes just before serving rather than storing them on top.
- Make-ahead tip: Bake the cheesecake 1–2 days in advance and refrigerate. The flavor actually deepens and improves with time, making it ideal for meal prep before a party.
Conclusion
This Easy Red Velvet Cheesecake is a must‑try dessert that brings together the rich flavors of red velvet with the creamy delight of a classic cheesecake. Whether you’re baking it as a red velvet cheesecake for a special occasion, using it as a go‑to easy cheesecake recipe, or sharing slices at gatherings and celebrations, its moist cheesecake texture and vibrant color are sure to impress. This is the perfect dessert for parties and cozy moments alike


