

Have you ever wondered why so many homemade New York cheesecakes turn out dry, cracked, or rubbery—despite following a “classic” recipe? The answer isn’t your skill; it’s the method. Most traditional recipes are overly complicated, demanding precise temperatures, water baths, and hours of anxious waiting. What if you could achieve that iconic, dense, velvety, and luxuriously creamy slice with a fraction of the fuss? That’s where this Easy Classic New York Cheesecake comes in. We’ve engineered a straightforward, no-stress approach that delivers the legendary taste and texture you crave, guaranteed. Forget the guesswork and the cracked tops; this is your passport to bakery-style perfection, right in your own kitchen. Seriously. This is the Easy Classic New York Cheesecake recipe you’ve been waiting for.
Table of Contents
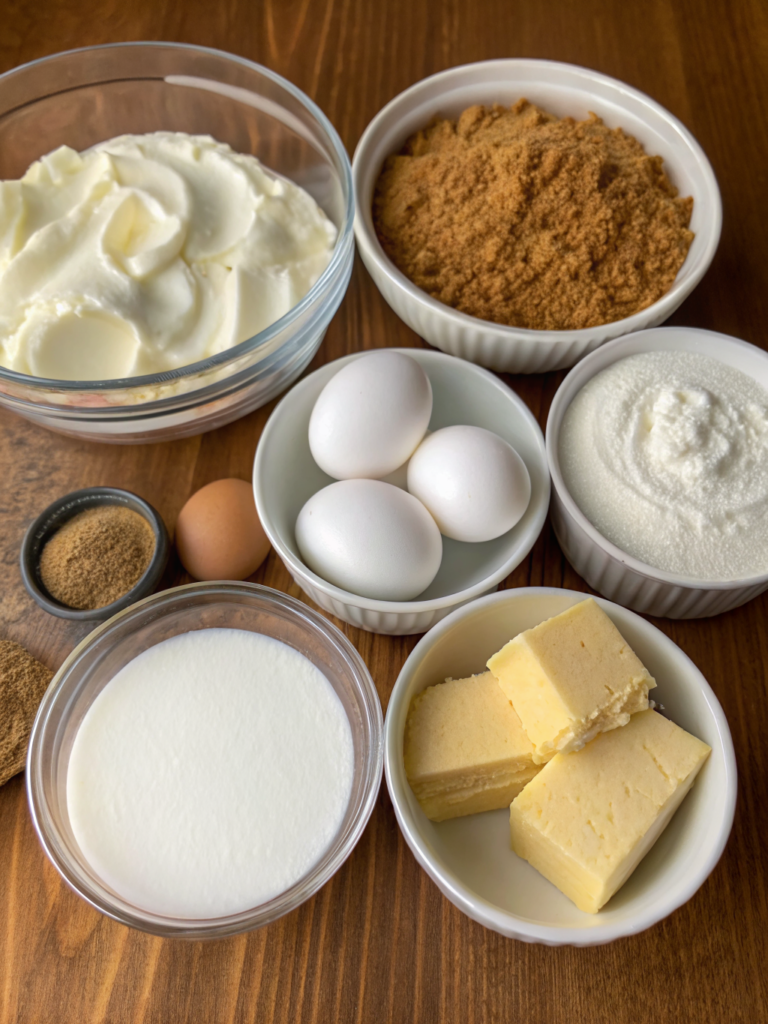
Ingredients: The Foundation of Flavor
For a truly iconic Easy Classic New York Cheesecake, ingredient quality is non-negotiable. This isn’t the place for low-fat substitutes if you want the real deal.
For the Crust:
- 1 ½ cups (150g) fine graham cracker crumbs (about 10 full sheets)
- ¼ cup (50g) granulated sugar
- 6 tablespoons (85g) unsalted butter, melted
- ¼ teaspoon ground cinnamon (optional, but recommended)
For the Filling:
- 4 (8-ounce/226g) packages full-fat, plain Philadelphia-style cream cheese, at room temperature (32 oz/900g total)
- 1 ½ cups (300g) granulated sugar
- 1 cup (240ml) full-fat sour cream, at room temperature
- 2 teaspoons pure vanilla extract
- 4 large eggs, at room temperature
- ⅔ cup (160ml) heavy cream (whipping cream)
- ⅛ teaspoon fine sea salt
Sensory Note: Imagine the rich, tangy aroma of cream cheese and sour cream mellowing into a sweet, vanilla-kissed batter. The crust should smell of toasted butter and caramelized sugar—a promise of the crisp, sandy base to come.
Ingredient Pro-Tip & Substitutions: The room-temperature rule is your #1 secret weapon. Cold ingredients lead to a lumpy, uneven batter that won’t bake smoothly. No graham crackers? Use crushed digestive biscuits, vanilla wafers, or even pretzels for a salty-sweet twist. For a gluten-free option, certified GF graham crumbs or almond flour work beautifully.
Timing: Your Investment in Deliciousness
This recipe respects your time without compromising on results.
- Preparation Time: 30 minutes (mostly hands-off mixing and crust prep)
- Baking Time: 55-65 minutes
- Total Time (with cooling): 4 hours minimum (but truly, 90 minutes of active work is a massive win compared to many traditional recipes that require a water bath setup, multiple temperature changes, and cooling for 6+ hours).
- Chill Time: Non-negotiable 6 hours, ideally overnight. This is when the magic happens—the cheesecake sets from a custard into a dense, sliceable dream. Plan ahead!

The Best Easy Classic New York Cheesecake Recipe
Ingredients
For the Crust:
- 1 ½ cups 150g fine graham cracker crumbs (about 10 full sheets)
- ¼ cup 50g granulated sugar
- 6 tablespoons 85g unsalted butter, melted
- ¼ teaspoon ground cinnamon optional, but recommended
For the Filling:
- 4 8-ounce/226g packages full-fat, plain Philadelphia-style cream cheese, at room temperature (32 oz/900g total)
- 1 ½ cups 300g granulated sugar
- 1 cup 240ml full-fat sour cream, at room temperature
- 2 teaspoons pure vanilla extract
- 4 large eggs at room temperature
- ⅔ cup 160ml heavy cream (whipping cream)
- ⅛ teaspoon fine sea salt
Instructions
- Step 1: Prepare and Pre-Bake the Crust
- Mix graham crumbs, sugar, cinnamon, and butter until sandy, then press into pan.
- Bake at 325°F (160°C) for 10 minutes, cool on rack to set crust.
- Step 2: Master the Batter
- Beat cream cheese until smooth, then add sugar, sour cream, and vanilla.
- Mix in eggs one at a time, then heavy cream and salt on low speed.
- Step 3: Bake Without a Water Bath
- Pour filling into crust and bake 55–65 minutes until edges set, center wobbly.
- Tent with foil if browning; do not overbake for creamy texture.
- Step 4: The Crucial Cool-Down
- Turn oven off, prop door open, and cool cheesecake inside for 1 hour.
- Loosen edges, cool fully, then refrigerate 6+ hours or overnight.
Video
Step-by-Step Instructions: Your Path to Perfection
Step 1: Prepare and Pre-Bake the Crust
Preheat your oven to 325°F (160°C). In a medium bowl, mix graham crumbs, sugar, and cinnamon. Stir in melted butter until it resembles wet sand. Press firmly and evenly into the bottom and about 1-inch up the sides of a 9-inch or 10-inch springform pan. Use a flat-bottomed glass or measuring cup to press it down tightly. Bake for 10 minutes. Let it cool on a wire rack while you make the filling. This pre-bake sets the crust and prevents sogginess.
Step 2: Master the Batter (The Most Important Step)
In your stand mixer fitted with the paddle attachment (or with a hand mixer and a large bowl), beat the room-temperature cream cheese on medium-low speed until completely smooth and free of any lumps, about 2 minutes. Scrape the bowl. Do not skip or rush this.
Add the sugar and beat until just combined. Mix in the sour cream and vanilla.
Add the eggs, one at a time, mixing on low speed until just incorporated after each addition. Overmixing incorporates too much air, the enemy of a dense, crack-free New York texture. Finally, pour in the heavy cream and salt, mixing on low until smooth and uniform.
Step 3: Bake Without a Water Bath
Place the cooled crust (on a parchment-lined baking sheet, just in case) in the preheated oven. Pour the filling over the warm crust. Bake for 55-65 minutes. The cheesecake is done when the edges are set, but the center (a 2-3 inch circle) still has a significant, creamy wobble—like Jell-O. It will firm up as it cools. Do not overbake. If the top begins to brown too much, tent it loosely with foil after 45 minutes.
Step 4: The Crucial Cool-Down
Turn the oven OFF. Prop the oven door open with a wooden spoon and let the cheesecake cool inside for 1 hour. This slow, gentle cooling prevents a dramatic temperature drop that causes收缩 cracks. Then, run a thin knife around the outer edge of the cake (not touching the top) to loosen it from the pan. Let it cool completely on the counter, then refrigerate for at least 6 hours, or overnight.
Nutritional Information (Per Slice, 1/12th of recipe)
- Calories: ~480 kcal
- Total Fat: 34g
- Saturated Fat: 20g
- Cholesterol: 175mg
- Sodium: 310mg
- Total Carbohydrates: 38g
- Dietary Fiber: 1g
- Sugars: 32g
- Protein: 8g
- These are estimates based on standard Ingredient databases. Actual values may vary based on specific brands and precise measuring.
Healthier Alternatives for the Recipe
Craving that classic taste with a lighter touch? These swaps maintain the essence while boosting nutrition:
- Sugar: Replace ½ of the granulated sugar with a 1:1 baking sugar substitute like Swerve or a blend of erythritol/monk fruit. For a lower-glycemic option, use coconut sugar (it will darken the cake slightly).
- Cream Cheese: For a tangier, slightly lighter profile, substitute 1 package of cream cheese with an equal amount of full-fat, plain Greek yogurt (drained if very watery).
- Crust: Skip the graham crackers! Use a nut-based crust (pulse pecans or almonds with a tbsp of sugar and butter) for a grain-free, higher-protein base.
- Sour Cream: Full-fat plain Greek yogurt can be used 1:1 for sour cream.
Serving Suggestions: Elevate Your Slice
Keep it classic with a drizzle of fresh strawberry or raspberry sauce and a dollop of lightly sweetened whipped cream. Go decadent with a salt caramel or chocolate ganache pour. For a brunch twist, top with a berry compote and a sprinkle of lemon zest. The dense, creamy texture also stands up beautifully to a graham cracker crumble or a single golden Oreo on the side. Serve it cold from the fridge for the perfect clean slice.
Common Mistakes to Avoid & Your Fixes
- Cold Ingredients = Lumps: Your #1 failure point. Always soften cream cheese, eggs, and sour cream to true room temp (at least 1 hour out of the fridge).
- Overmixing the Batter: Beat just until ingredients are combined. Overbeating = air bubbles = cracks.
- Opening the Oven Door Too Soon: The first 45 minutes are critical for setting. Do not peek or jostle it.
- Undercooking/Overcooking: The “wobbly center” test is your best friend. It will set as it cools. A cracked top usually means it was overbaked or cooled too quickly.
- Skipping the Knife-Run: Loosening the cake from the pan after baking but before cooling prevents it from sticking and pulling inward as it sets.
Storing Tips for Your Cheesecake
This cheesecake only gets better the next day!
- Refrigerator: Store the fully cooled cheesecake in the springform pan, covered tightly with plastic wrap, for up to 5 days. For neat slices, run a clean knife under hot water between cuts.
- Freezer: For long-term storage, freeze individual slices. Place parchment paper between slices on a baking sheet, freeze solid, then wrap each slice tightly in plastic wrap and foil. Freeze for up to 2 months. Thaw in the refrigerator overnight.
- Make-Ahead: This is the perfect make-ahead dessert. Bake it 1-2 days before your event. The flavors meld and the texture becomes perfection.
Did you try our recipe?
i tried this recipe , i love it
I tried the Easy New York Cheesecake Recipe, and it was amazing! So creamy, perfectly sweet, and really simple to make. Even as a beginner, I got a flawless cheesecake that everyone loved. Highly recommend!

Conclusion: Your Slice Awaits
You now hold the blueprint for the most reliable, delicious Easy Classic New York Cheesecake you’ll ever make. By focusing on technique—room-temperature ingredients, minimal mixing, and controlled cooling—you bypass all the traditional pitfalls. This isn’t a shortcut that sacrifices quality; it’s a smarter, data-backed way to achieve bakery-quality results every single time. Now, preheat that oven. Your legendary cheesecake is calling.
Ready to become the cheesecake hero of your next gathering? Get that cream cheese to room temp and get baking! We’d love to see your masterpiece—share your results and photos in the comments below. For another no-fuss, flavor-packed dessert, check out our [related keyword].
FAQs
Q: Can I use a different pan?
A: Absolutely. A 9-inch springform is standard. A 10-inch will yield a slightly shorter, wider cake (reduce bake time by 5-10 minutes). Do not use a regular cake pan; the sides are too high and will prevent even baking.
Q: My cheesecake cracked! Is it ruined?
A: Never! A cracked top is purely cosmetic. Simply top it with a beautiful fruit sauce, caramel, or whipped cream—it will hide the flaw and add even more flavor. The inside will still be perfectly creamy.
Q: I don’t have a springform pan. What can I use?
A: You can use a deep dish pie plate. Press the crust only on the bottom. The baking time may be slightly less (check at 50 minutes). You won’t be able to remove the sides, but you can slice and serve directly from the plate.
Q: Why is my cheesecake wet on top after baking?
A: This is likely “weeping” from the cream cheese, often caused by overbeating or using low-quality cream cheese with stabilizers. It’s still safe and will firm up in the fridge. Pat it gently with a paper towel before chilling.
Q: Can I bake this in a water bath? Is it necessary?
A: For this specific, simplified recipe, a water bath is not necessary and can actually make the crust soggy. Our method of starting the oven hot (325°F) and using the “wobbly center” finish creates a perfectly smooth top without it.
Q: My cheesecake didn’t set in the middle after chilling. What happened?
A: This is usually from underbaking. The center should still be wobbly when you take it out of the oven. If it’s completely liquid, it likely needed 10-15 more minutes in the oven. Unfortunately, once chilled, it cannot be re-baked. You can blend it into a delicious cheesecake dip for fruit!


